Custom settings
OrbitSailor provides powerful tools to personalize services you create, ensuring they align perfectly with your specific needs. With features such as Custom Filename Template and Custom Message Format, you can tailor outputs to match your workflow and standards effortlessly. Explore the options below to see how OrbitSailor can make integrating its services into your processes even more seamless.
Custom filename template
Supported Template values:
- %Y - The Current Year
- %YYYY - The Current Year
- %M - The current Month
- %MM - The current Month, zero-padded to 2 digits
- %MMMM - The current Moth, written as an english Word<
- %D - The current day
- %DD - The current day, zero-padded to 2 digits
- %h - The current hour (24 hour format)
- %hh - The current hour (24 hour format), zero-padded to 2 digits
- %m - The current minute
- %mm - The current minute, zero-padded to 2 digits
- %s - The current second
- %ss - The current second, zero-padded to 2 digits
- %I - ISO-like datestring with the ":" characters replaced by "_"
Example
Input
MyFile-%YYYY-%MM-%DD-%hh-%mm-%ss.datOutput
MyFile-2024-12-06-15-38-10.datCustom message format
OrbitSailor decodes the following AIS messages: 1, 2, 3, 4, 5, 6, 8, 9, 11, 12, 14, 18, 19, 21, 24, 27. The remaining messege types, i.e. 7, 10, 13, 15, 16, 17, 20, 22, 23, 25, 26 are not decoded. If you need information from these messages, please contact the OrbitSailor team to enable it. When you use the PositionUpdateService, all decoded messages are combined into one JSON file.
You can also select individual values and build your own message type. When creating a new PositionUpdateService (see more details on a dedicated page), navigate to:
- A DELIVERY CONFIGURATION tab
- Click on ADD DELIVERY CONFIGURATION link
- Switch on a toggle switch Customize Message Format
- Click on Click to edit the template

A new pop-up window shows up. In order to see all available fields, select PositionUpdateService from the Predefined templates in the upper-left corner of the window. 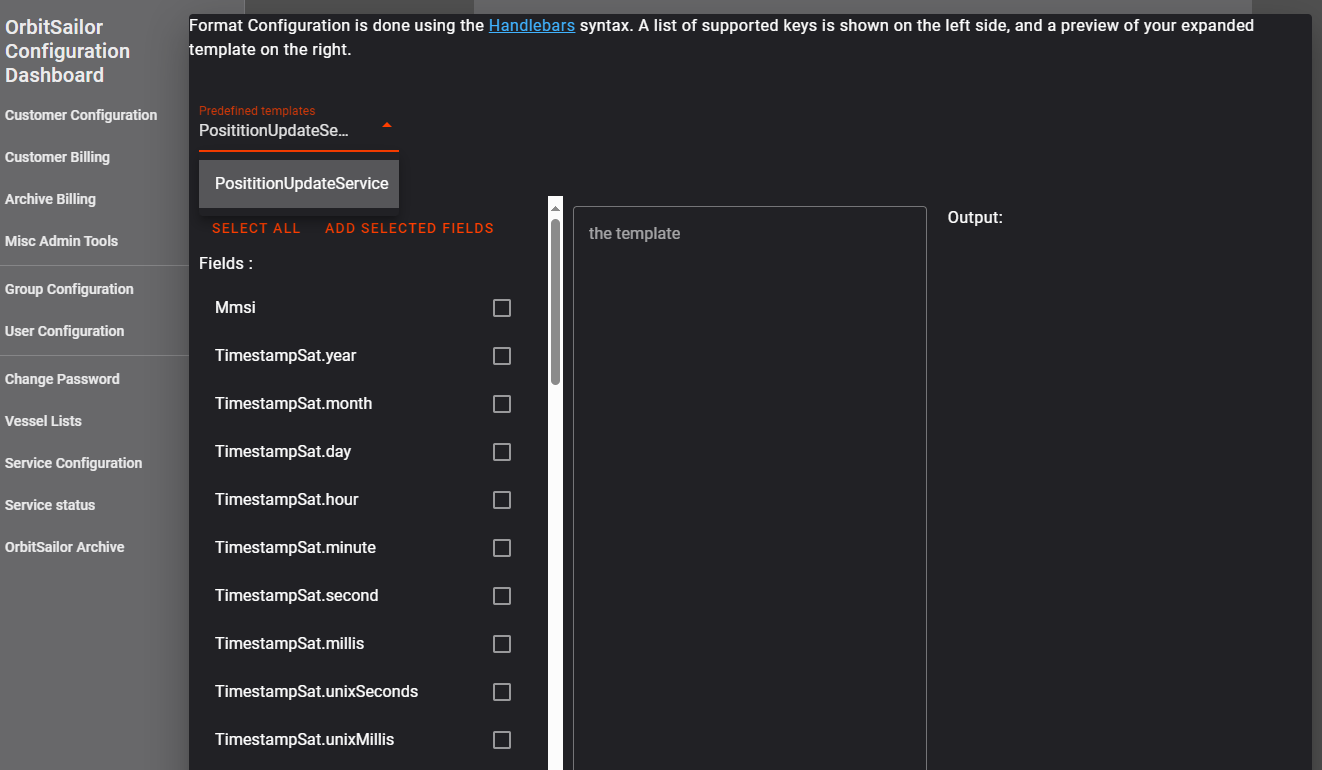
In the left pane you will see all the fields that are decoded from AIS messages. You can select them by clicking on checkboxes next to each field you want. 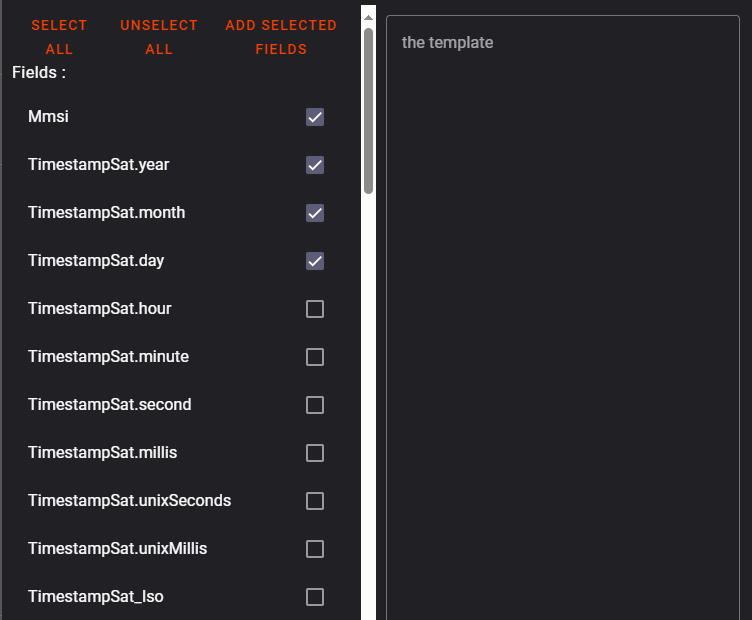
Once you select all the fields you want, you need to click on ADD SELECTED FIELDS. All selected fields will be added to the the template window in the center. The preview of your message is in the Output pane on the right. 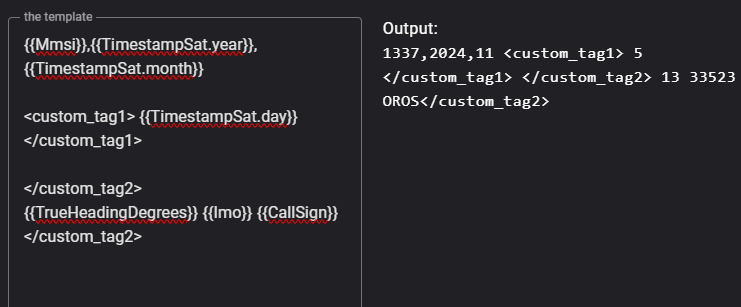
Note: all fields are in double-curly-brackets, e.g.:
{{Mmsi}}You can edit your message the way you want (e.g. CSV, JSON) by adding your custom objects, delimiters, and whatever you want. The editor supports the Handblebars syntax.
After you finish editing your custom message, click on CLOSE on the bottom of the editor. The window will be closed and you will return to the DELIVERY CONFIGURATION tab of the Service Configuration dashboard.
Always remember to click on SAVE button to save your new settings.
Now, your new custom message format is ready for delivery.